Yesterday's lousy weather wasn't inspiring but was good enough to tinker and make version 4!
If you have been following the Portable Sketch Easel versions, you'll know that James Gurney's work was my inspiration. So far, I think I satisfied all his 8 goals in making one. I have a very limited set of tools to work with but sufficient enough for the first two versions of the project.
Tools:
1. Black & Decker Electric Drill and Drill Bits.
2. Phillips and Flat Head Screw Drivers
3. Leatherman Tool
With the original version (PSEV1), not having a wood saw wasn't a problem because of the already pre-cut Cedar Grilling Planks found at the Home Depot seasonal section. Installing the hinges with adjustable torque require 8 pcs of screws, not included in the Amazon purchase, so I had to buy them per piece at the local hardware store. After PSEV1 was completed, I wasn't happy. The top plank wouldn't fold all the way flat because of the hinge hardware design.
So why not try another type of hinge? I thought a constant torque control position hinge without needing adjustments was the answer! Having almost identical required materials, I dismantled PSEV1 and installed the new hinges with a narrower foot print. Alas, the hinge fold all the way flat, and smooth, but the torque load tolerance wasn't strong enough. Definitely an issue!
Nothing got recycled from PSEV2.
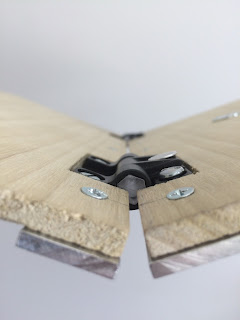
For the third version (PSEV3), I purchased new materials from Home Depot and at the local hardware store. I found the unbelievably thin aluminum screw posts, normally used for binding papers, as a fantastic solution to the screw head issue.
For the third version (PSEV3), I purchased new materials from Home Depot and at the local hardware store. I found the unbelievably thin aluminum screw posts, normally used for binding papers, as a fantastic solution to the screw head issue.
Excited about this solution, I emailed James Gurney and received a prompt reply.
"Thanks for sharing that tip on how to make those pesky hinges fold all the way flat. It seems like a more efficient solution than adding the piece on the back and building up the slot angles.
"Thanks for sharing that tip on how to make those pesky hinges fold all the way flat. It seems like a more efficient solution than adding the piece on the back and building up the slot angles.
I've been meaning to do a blog post sharing some of the readers' innovations, so maybe I'll do that if it's OK with you."
Of course, I said OK in my reply.
Of course, I said OK in my reply.
Remember, I don't have a wood saw but at Home Depot, they have a free service where you have your purchased wood cut to length. I did that to finish PSEV3. I thought the aluminum posts narrowed the gap when in fold flat position. The gap was still an issue because the hinges were mounted atop the board! There's gotta be a better solution!
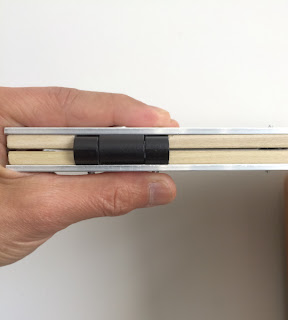
Enter version 4 (PSEV4), a fully folding flat easel! Because I have limited tools, I needed to use some creativity. I purchased the aluminum bar at Home Depot. While the Plumbing Section don't have a metal cutting machine for flat bars (it's only for pipes), they let me borrow a Hack Saw from their tool box. At the Lumber section, I borrowed the regular carpenter saw to cut out the hinge's footprint section from the panels I used in version 3. I also picked up some more loose hardware items at the local hardware store.
Now, it has gotten a little bit more complicated. It was tricky drilling the holes onto the aluminum bars. The first mistake I made was to pre-drill all the marked spots before fitting the hinges. Well, it turned out the holes were misaligned so I had to redo it. This time, I measured the fit countless times before fully drilling the holes. It paid off.
Presenting the newest version PSEV4.
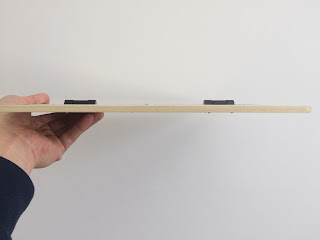 |
| Front View |
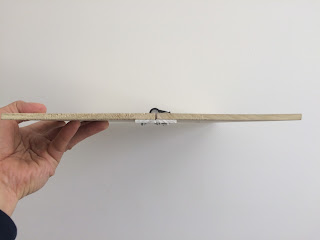 |
| Side View |
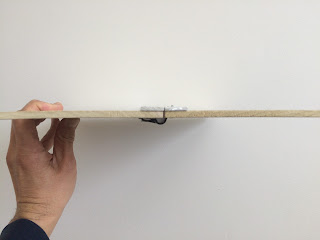 |
| Upside-down View |
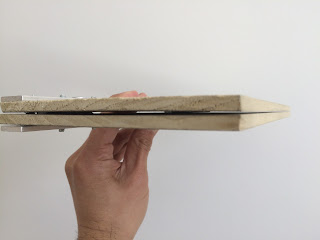 |
| Three Quarters Side View |
 |
| Fold Flat Hinge |
 |
| Wing View |
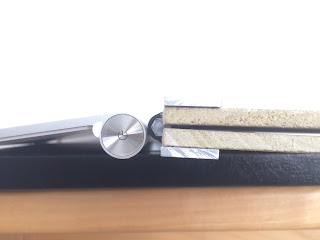 |
| Height Comparison: Apple Keyboard versus PSEV4 |
There are some minor finishing touches I'd like to be done for the protruding screw tips but for the most part, I'm very much pleased with this design.
So what did I learn this time around?
1. It is way better to have the right tools for the job.
2. It is wonderful to find a solution to an issue.
3. It feels good to realize how a crazy idea was a solution to the problem.
Thank you for the many feedback on the PSE design. I believe this newest version wouldn't have been possible without your precious input. Glad "our" collaboration on PSEV4 was a success!
UPDATE: It's so modular, I love it! If I want a bigger size board, I'll just unscrew the old boards and replace them with whatever size I want!


I love how you persisted until you got it to do precisely what you needed. Good for you!!!
ReplyDeleteThanks, Joan. I really enjoyed each and every stage of the creative process until I arrived at this design. Now feeling really good about it..
DeleteThat is a great design hack, will have to do that in my next DIY box. Thanks!
ReplyDeleteThank you, Jim.
DeleteWhen will you be reafy to take orders? Lol
ReplyDeleteLOL! But wait...there's more!
DeleteHola buenos dias me llamo Pedro he visto lo de los tornillos de encuadernar com O solucion para la paleta y té quisiera preguntar si estàs tornillos són de la missa rosca que la de las bisagras que creo que són de metrico 5 O las hay de diferentes roscada porque tengo el mismo problema que no se me cirera del Todó.
DeleteUn saludo.
Gracias